Sprouting quinoa is a simple yet transformative process that unlocks this ancient grain’s full nutritional potential. When you sprout quinoa, you’re essentially awakening the seed and initiating germination, which triggers enzymatic changes that make nutrients more bioavailable and easier for your body to absorb.
Why Sprout Quinoa? The Science-Backed Benefits
Sprouting isn’t just a food trend—it’s a time-honored technique with significant nutritional advantages backed by research.
Enhanced Nutritional Profile
When quinoa sprouts, several remarkable changes occur. The sprouting process increases vitamin C content significantly and boosts B-vitamin levels, particularly folate and riboflavin. According to research published in the National Center for Biotechnology Information, sprouting can increase certain nutrient levels by up to 400%.
Improved Digestibility
Sprouting breaks down antinutrients like phytic acid, which can interfere with mineral absorption. This process makes the protein, iron, and magnesium in quinoa more accessible to your digestive system. Many people who experience digestive discomfort with regular quinoa find sprouted versions much gentler on their stomachs.
Practical Kitchen Benefits
Beyond nutrition, sprouted quinoa offers practical advantages. It cooks in half the time of unsprouted quinoa, and it can even be eaten raw, adding a pleasant crunch to salads and smoothie bowls. The sprouting process also mellows the slightly bitter taste some people detect in regular quinoa.
What You’ll Need to Get Started
One of the best things about sprouting quinoa is how minimal the equipment requirements are. You likely have everything you need already in your kitchen.
Ingredients
- Raw quinoa – 1 cup (organic, unwashed quinoa works best)
- Filtered water – for rinsing and soaking
Equipment
- Wide-mouth glass jar (quart-size works perfectly)
- Fine-mesh strainer or sprouting lid
- Cheesecloth and rubber band (alternative to sprouting lid)
- Bowl for catching drainage water
Step-by-Step Guide to Sprouting Quinoa
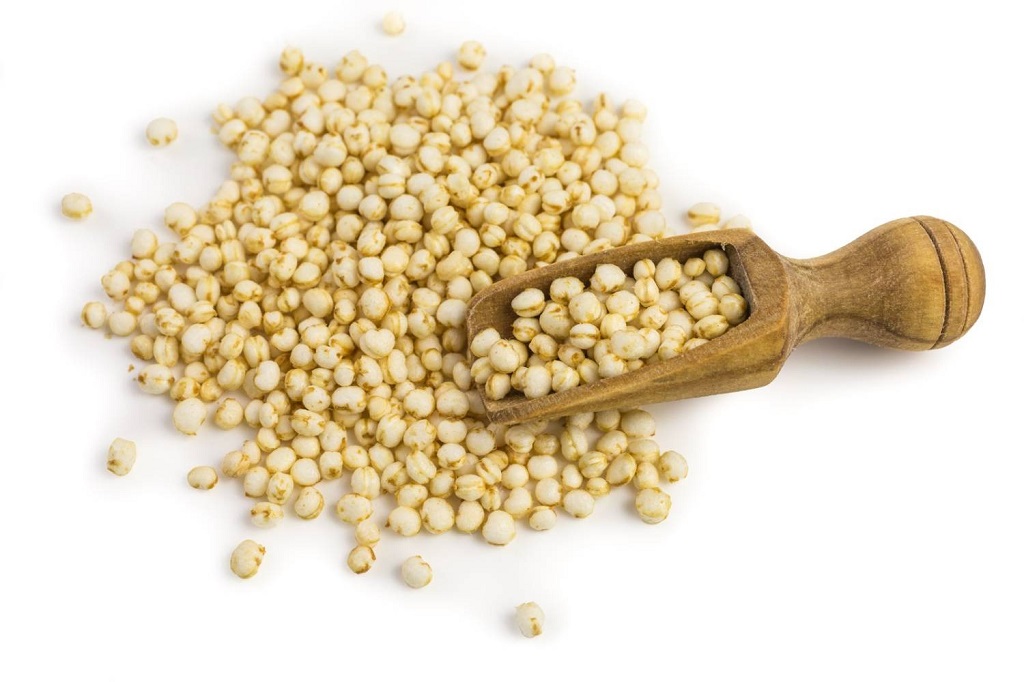
Step 1: Rinse Thoroughly
Place your quinoa in a fine-mesh strainer and rinse under cold running water for 2-3 minutes. This crucial step removes saponins, the natural bitter coating that protects quinoa seeds from birds and insects. Keep rinsing until the water runs clear and you no longer see any foam or bubbles.
Step 2: The Initial Soak
Transfer the rinsed quinoa to your glass jar and cover with filtered water at a 3:1 ratio (3 cups water to 1 cup quinoa). Let it soak at room temperature for 2-4 hours. Don’t soak longer than 4 hours, as quinoa is a small seed that absorbs water quickly and can become mushy with extended soaking.
Step 3: Drain Completely
After soaking, pour the quinoa through your strainer and rinse again with fresh water. Shake the strainer vigorously to remove as much water as possible. Excess moisture is the enemy of successful sprouting—it creates an environment where mold can develop.
Step 4: Begin the Sprouting Process
Return the drained quinoa to your jar. If using a sprouting lid, secure it on top. If using cheesecloth, cover the jar opening and secure with a rubber band. Place the jar at a 45-degree angle in a bowl, with the opening facing down to allow air circulation and drainage. This setup is critical for preventing mold.
Keep your jar in a location with indirect light and room temperature between 68-75°F (20-24°C). A kitchen counter away from direct sunlight is perfect.
Step 5: Rinse and Drain Schedule
This is where the magic happens. Rinse your quinoa thoroughly 2-3 times per day—morning and evening at minimum, with a midday rinse if you’re home. Each time:
- Fill the jar with cool water through the sprouting lid
- Swirl gently to rinse all seeds
- Drain completely through the lid
- Return to the angled position in your bowl
Within 12-24 hours, you’ll start seeing small white tails emerging from the seeds. This is your sprout! Continue the rinsing schedule for 1-3 days total, depending on your preference. I prefer harvesting when the tail is about 1/4 inch long—usually around day 2.
Step 6: Final Rinse and Storage
Once your sprouts reach the desired length, give them one final thorough rinse. Spread them on a clean kitchen towel or paper towels and gently pat dry. Removing surface moisture is essential for storage longevity.
Proper Storage for Maximum Freshness
Transfer your dried sprouts to an airtight container lined with a paper towel to absorb any residual moisture. Store in the refrigerator where they’ll stay fresh for 3-5 days. Check daily for any off-smells or signs of mold, and discard if you notice either.
Pro tip: Don’t wash all your sprouts at once. Keep them in the fridge and rinse only the portion you plan to use that day for the best texture and freshness.
Creative Ways to Use Sprouted Quinoa
The versatility of sprouted quinoa is truly impressive. Here are my favorite ways to incorporate it into meals:
Raw Applications
- Toss into green salads for added protein and crunch
- Sprinkle over smoothie bowls or yogurt parfaits
- Blend into raw energy balls or granola bars
- Use as a crunchy topping for avocado toast
Cooked Preparations
- Quick-cook in just 5-10 minutes (versus 15-20 for regular quinoa)
- Add to soups and stews in the last 10 minutes of cooking
- Stir-fry with vegetables for a nutrient-dense side dish
- Use in grain bowls with your favorite protein
Troubleshooting Common Sprouting Issues
| Problem | Cause | Solution |
|---|---|---|
| No sprouts appearing after 48 hours | Old quinoa or insufficient moisture | Use fresh quinoa; ensure seeds stay moist between rinses |
| Mold or musty smell | Too much moisture or inadequate drainage | Increase rinsing frequency; ensure better drainage angle |
| Bitter taste remains | Saponins not fully removed | Rinse more thoroughly before initial soak |
| Sprouts become slimy | Over-sprouting or water temperature too warm | Harvest earlier; use cooler water for rinsing |
Essential Safety Guidelines
While sprouting is generally safe, following proper food safety practices is crucial:
- Start with quality seeds: Purchase quinoa specifically labeled for sprouting when possible, or choose organic varieties
- Maintain cleanliness: Wash your hands thoroughly before handling sprouts, and sanitize jars and equipment between batches
- Trust your senses: If sprouts smell off, appear slimy, or show any signs of mold, discard the entire batch immediately
- Keep it cool: Never sprout in temperatures above 75°F, as warm conditions promote bacterial growth
- Rinse religiously: Skipping rinses creates the perfect environment for harmful bacteria
Frequently Asked Questions
Can I sprout red or black quinoa, or just white quinoa?
All quinoa varieties—white, red, black, and tri-color—can be sprouted using the same method. Red and black quinoa may take slightly longer (closer to 3 days) and tend to have a firmer texture when sprouted. I recommend starting with white quinoa as it sprouts most reliably and quickly.
How long does sprouted quinoa last in the refrigerator?
Properly dried and stored sprouted quinoa lasts 3-5 days in the refrigerator. Always store in an airtight container with a paper towel to absorb moisture. If you notice any off-smell, sliminess, or discoloration, discard immediately.
Do I need to cook sprouted quinoa, or can I eat it raw?
Sprouted quinoa is safe to eat raw and actually retains more nutrients when consumed uncooked. The sprouting process makes it tender and digestible without cooking. However, if you prefer, you can lightly cook it in just 5-10 minutes.
Why isn’t my quinoa sprouting?
The most common reasons are old seeds that have lost viability, pre-rinsed quinoa (which may have been heat-treated), insufficient moisture between rinses, or temperatures that are too cold. Try using fresh, raw quinoa and ensure you’re rinsing at least twice daily.
Is sprouted quinoa better than regular quinoa?
Sprouted quinoa offers several advantages: increased bioavailability of nutrients, reduced antinutrients like phytic acid, improved digestibility, and the ability to eat it raw. Regular quinoa is still nutritious, but sprouting enhances these qualities significantly.
Can I freeze sprouted quinoa?
Yes! Spread sprouted quinoa on a baking sheet and freeze until solid, then transfer to freezer bags. Frozen sprouted quinoa lasts up to 3 months and can be added directly to cooked dishes or thawed for raw applications.
What’s the white tail that appears—is that the sprout?
Yes! That small white tail is the beginning of the quinoa plant’s root. It typically appears within 12-24 hours and is the sign that your quinoa is successfully sprouting. Harvest when tails are 1/4 to 1/2 inch long for optimal texture and nutrition.
Related Topic: Old Home Remedies for Baby Teething
Conclusion: Your Journey to Better Nutrition Starts Here
Sprouting quinoa is one of the simplest ways to maximize the nutritional value of this superfood while adding versatility to your cooking. With just a jar, some water, and 2-3 days of minimal effort, you’ll have fresh, nutrient-dense sprouts that enhance everything from salads to cooked grains.
The process may seem unfamiliar at first, but after your first successful batch, it becomes second nature. Start with a small amount—half a cup of dry quinoa—and experiment with different harvest times to discover your preferred texture. Before long, you’ll have a constant supply of fresh sprouts enriching your meals and supporting your health goals.
Remember, the key to successful sprouting is consistency with your rinsing schedule and proper drainage. Master these two elements, and you’ll be a sprouting expert in no time. Your body—and your taste buds—will thank you for making this simple yet powerful addition to your healthy eating routine.